How To Make Vermicompost At Home for Organic Fertilizer
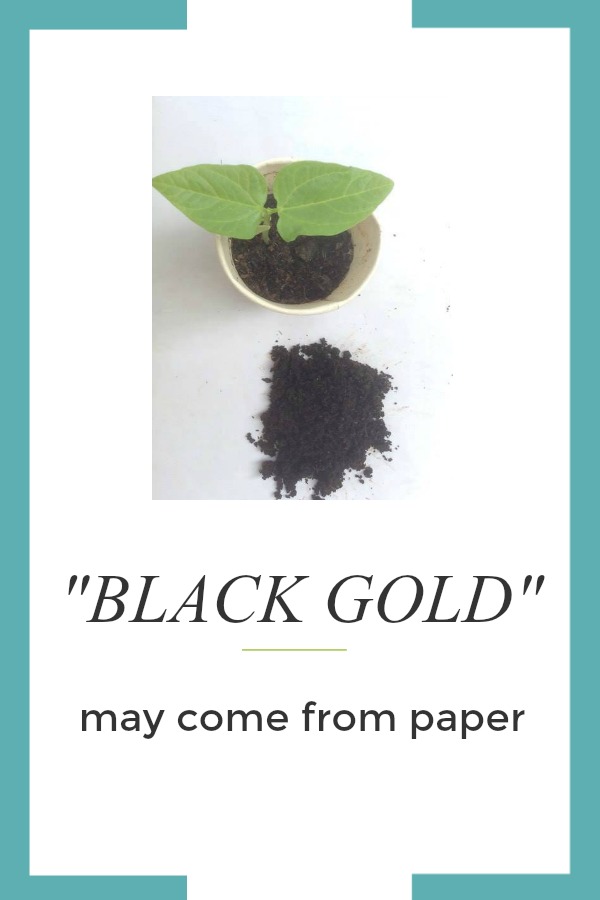
Vermicompost or worm castings (vermicast) organic fertilizer is “black gold”, and I found it extremely helpful in organic gardening. I’m sharing learnings from my hands-on experience of making vermicompost of 5 years, in the hope that we could reduce our garbage and produce natural foods from biodegradable kitchen wastes. I started learning how to make vermicompost when I attended a seminar conducted by Ms. Pamela Henares, and then I supplemented the knowledge with more readings (such as below), and by trial and error. Ms. Henares is one of the experts in the Philippines on vermi-culture, and you could see her work in this video.
Here are more vermiculture experts in Bacolod City, the Philippines.

These are their instructions:
Since their instruction is in the local dialect, I’m translating their instruction in English (in italics). I added my learnings (not in italics). All errors and omissions are mine. Here goes:
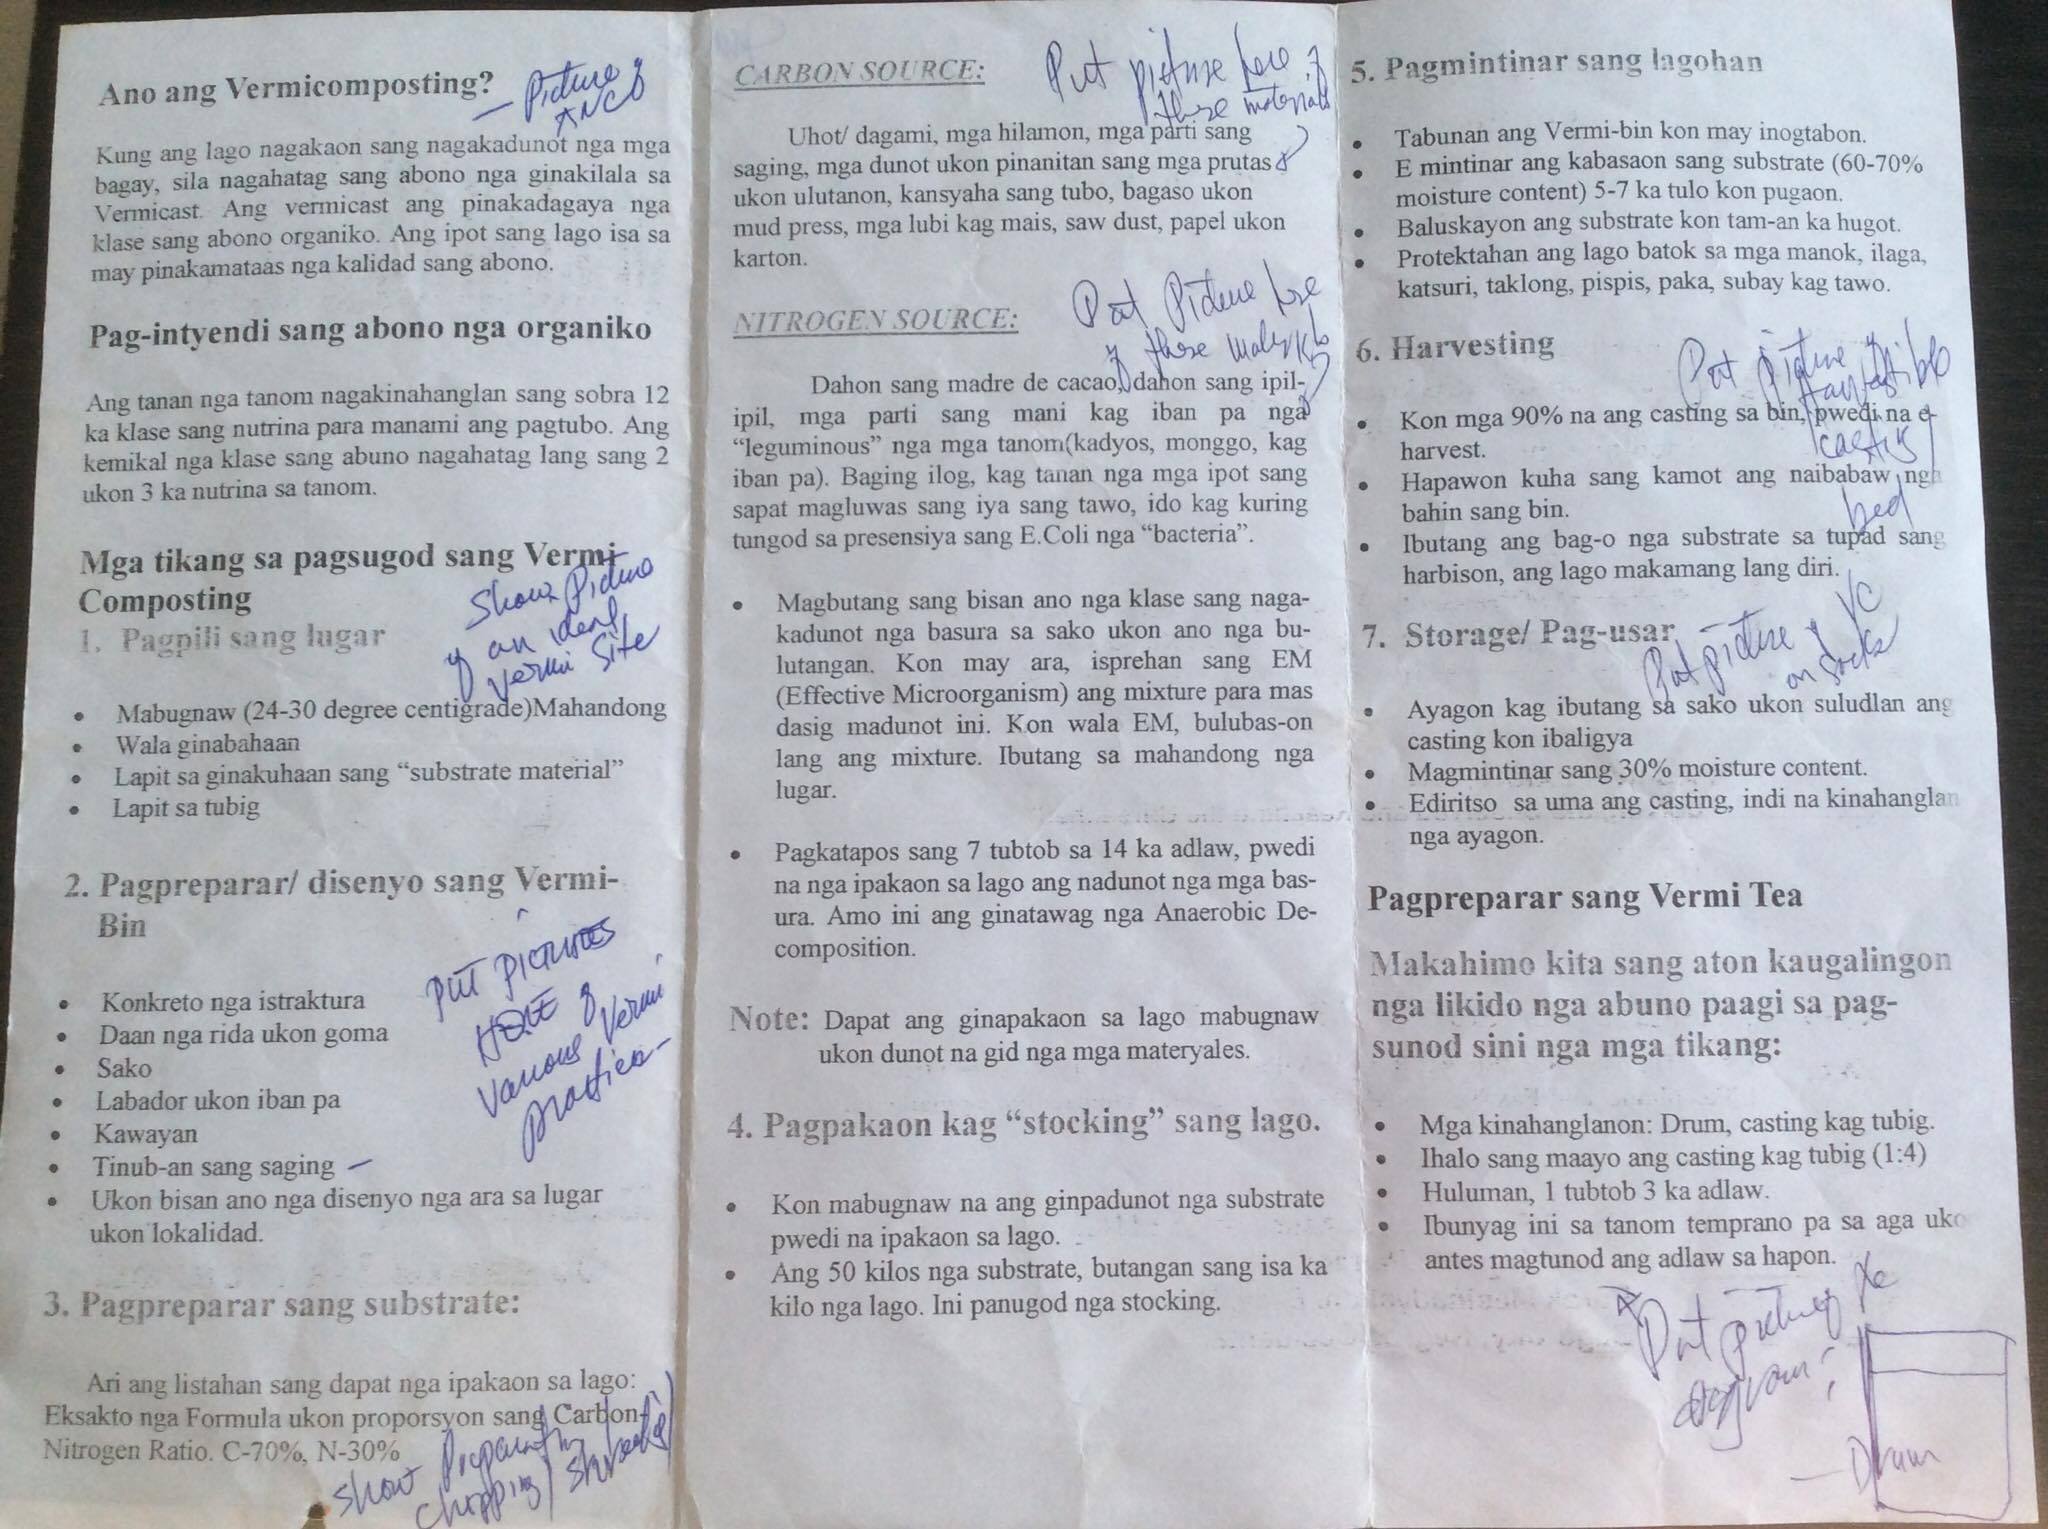
- What is vermicomposting?
- When worms ingest biodegradable materials, they give off fertilizer known as vermicast. The vermicast is one of the richest kind of organic fertilizer. It is one of the highest quality fertilizer.
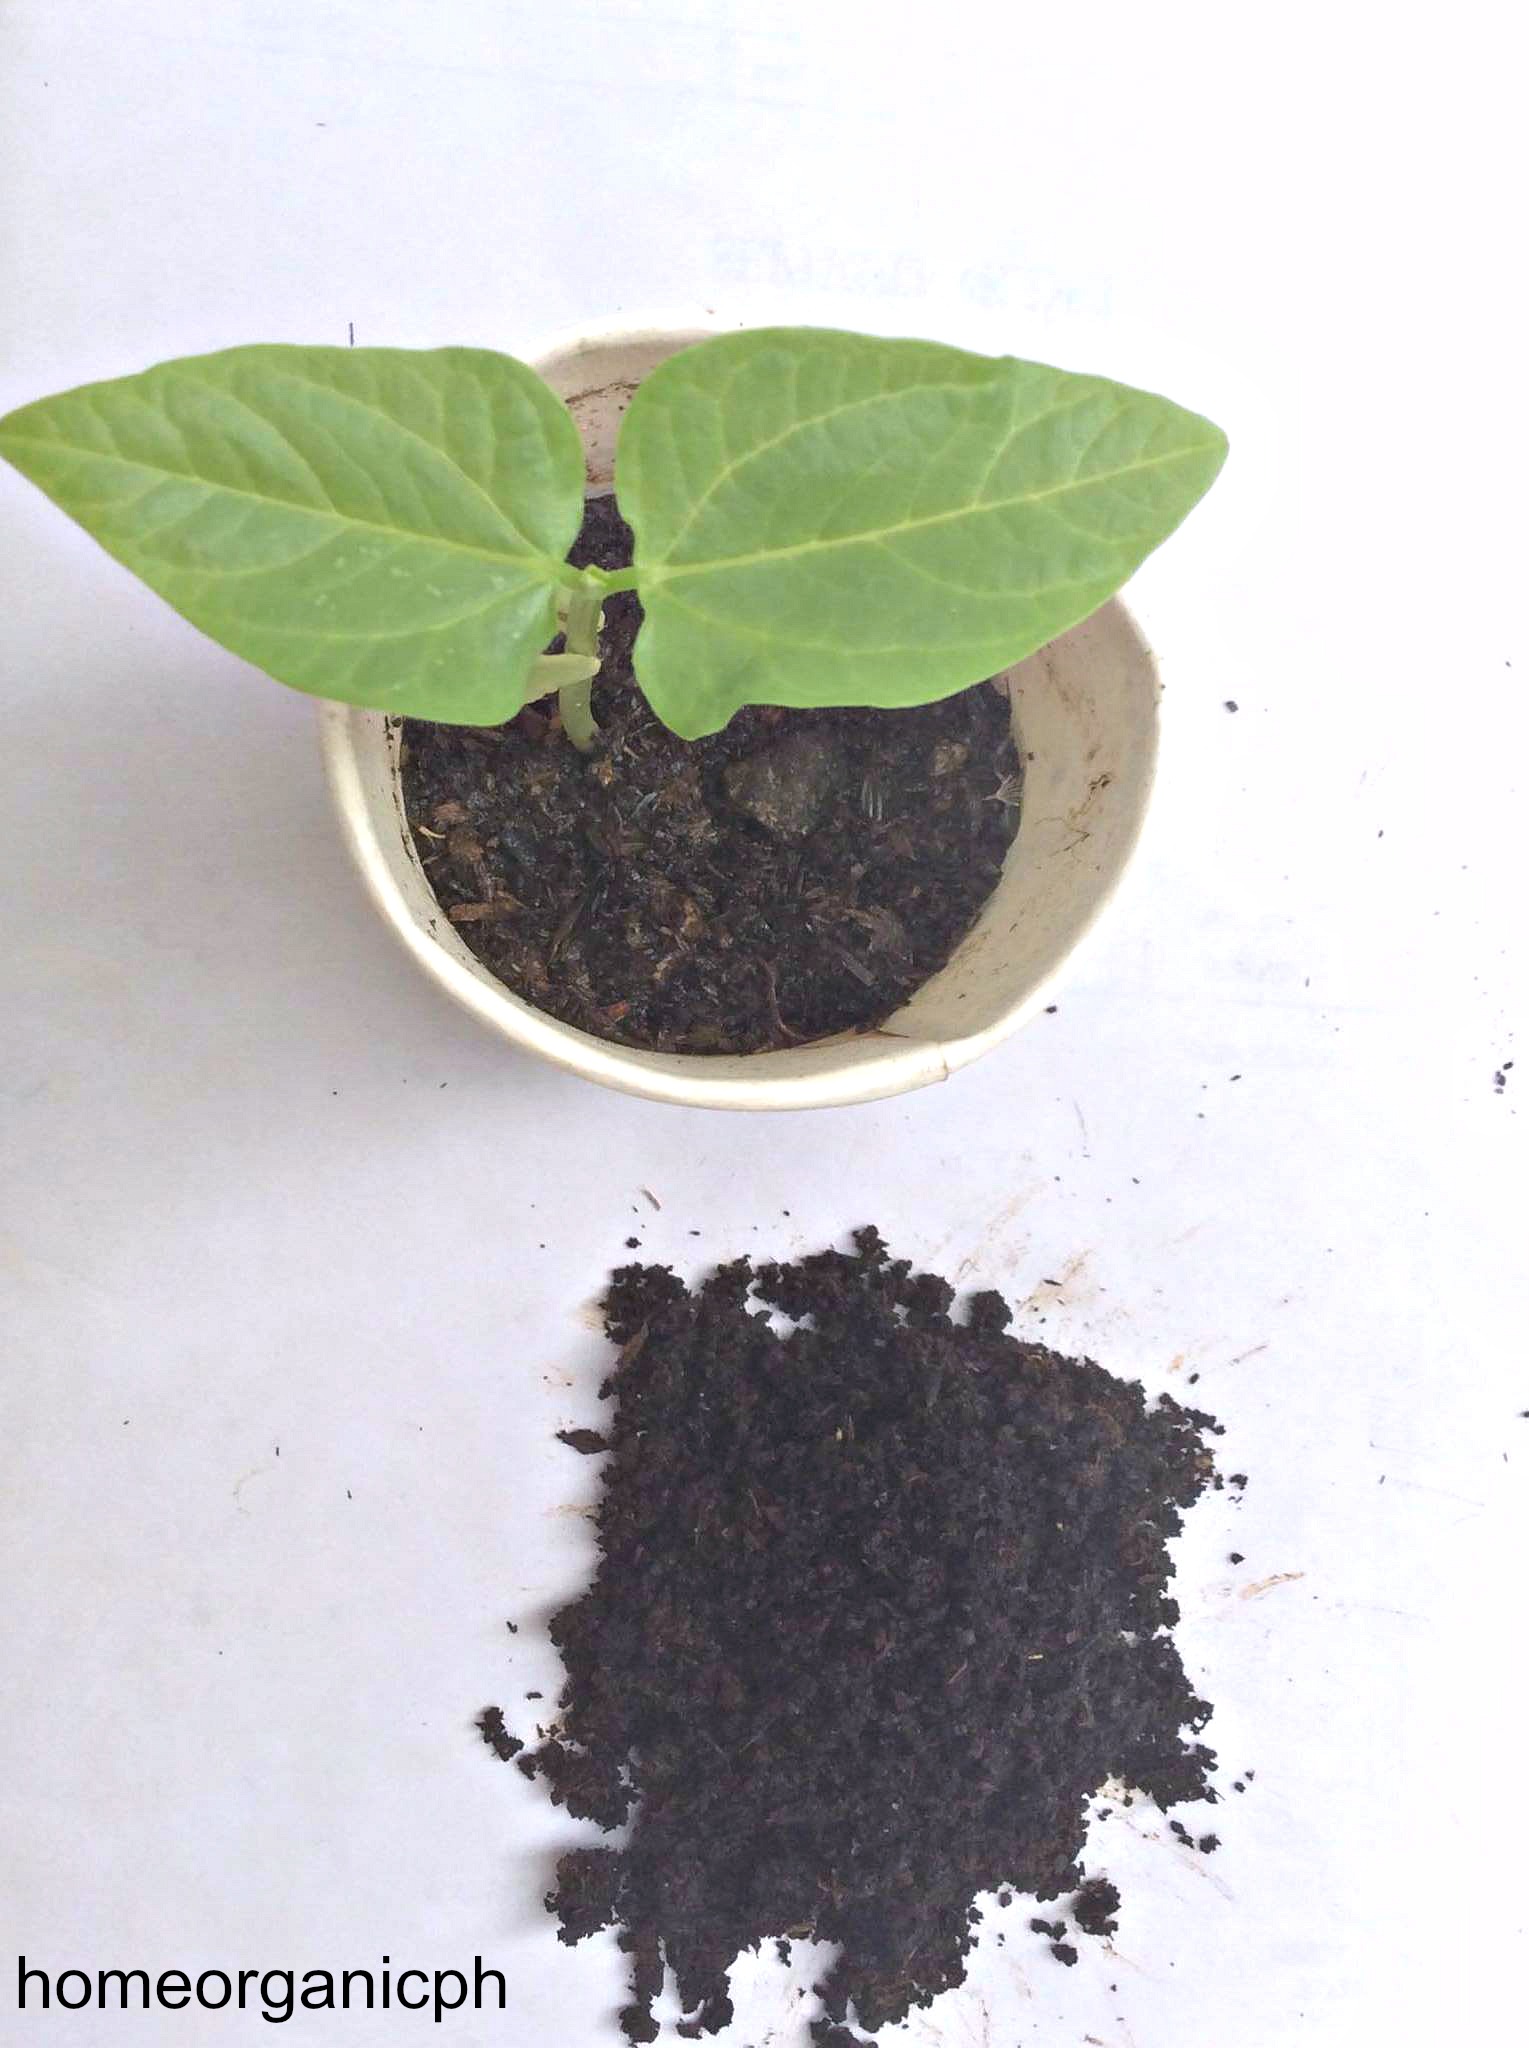
- From my experience, any or all plants and seeds that I sow survive as long as there’s worm castings or vermicompost (vermicast). My mantra: “Use vermicompost, will grow anything!”
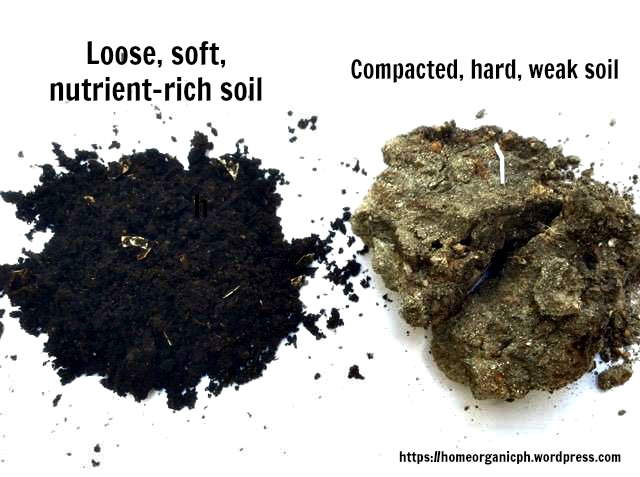
- This is pure worm castings or vermicompost (vermicast). It is black and odor-free.
- Understanding organic fertilizer
- All plants need more than 12 kinds of nutrients in order to grow healthy. Chemical fertilizers only provide 2 or 3 nutrients to plants.
- Steps in starting vermi-composting
- Choosing location.
- Cool and shaded place, with temperature between 24-30 degrees Celsius
- Not flooded
- Near the source of substrate materials
- Near the water source
- This is my vermicompost set-up at home, and I labeled the set-up.
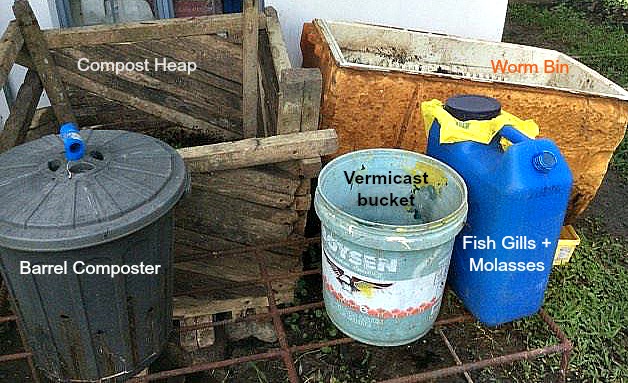
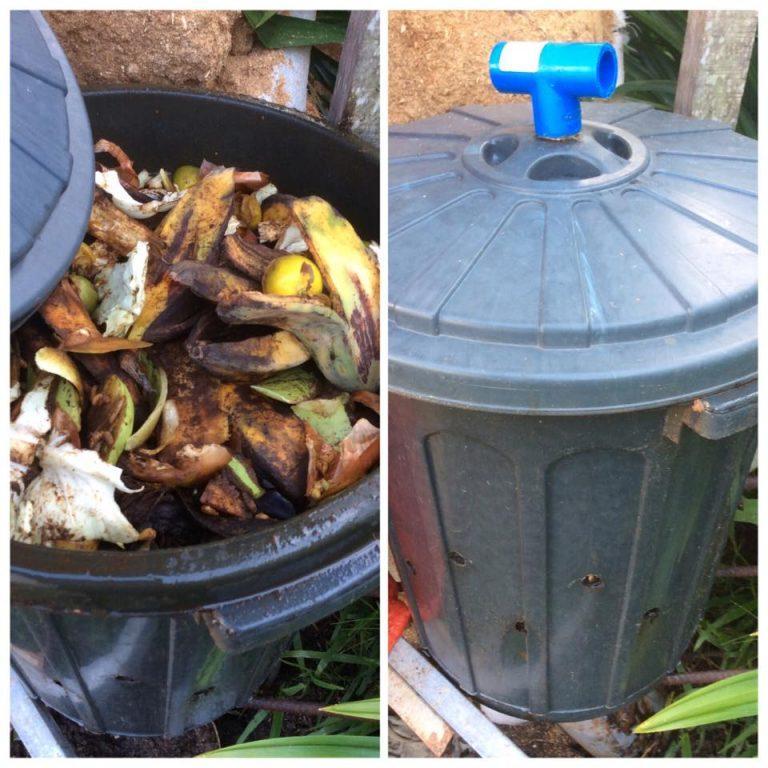
- We place our bio-degradable kitchen wastes into the compost bin (barrel composter), which are then decomposed by the black soldier fly larvae. Compost bin is recycled trash bin from my old biz office.
- When the decomposed kitchen wastes turn black and cool, we feed them to the worms (inside the worm bin). Worm bin is recycled old refrigerator box.
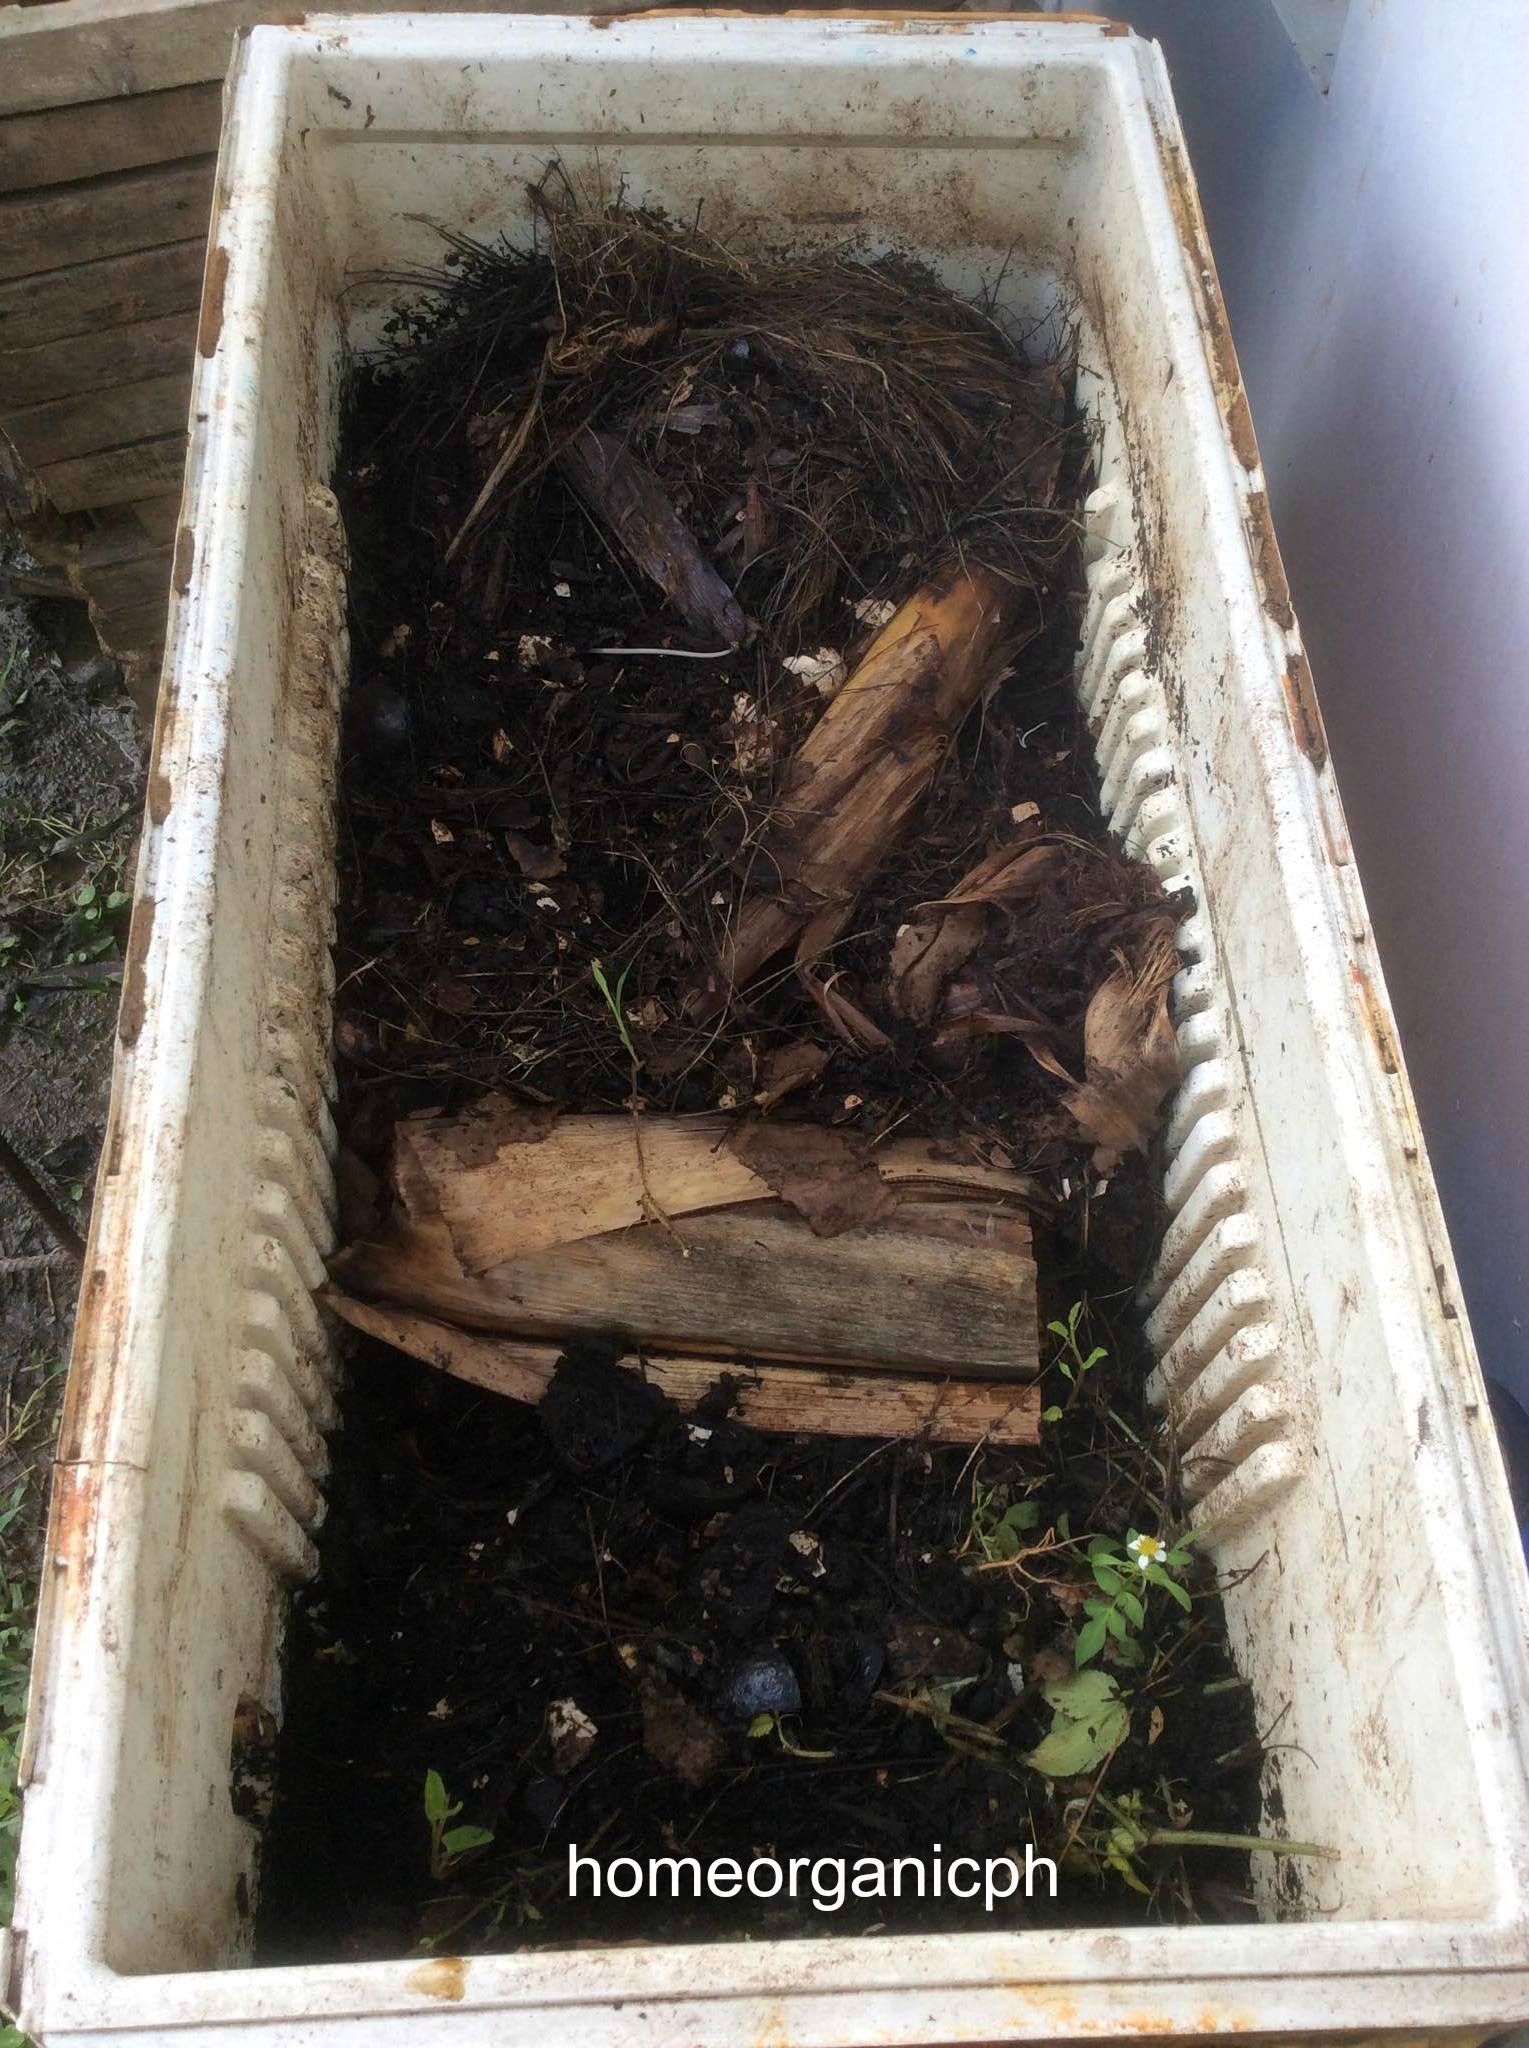
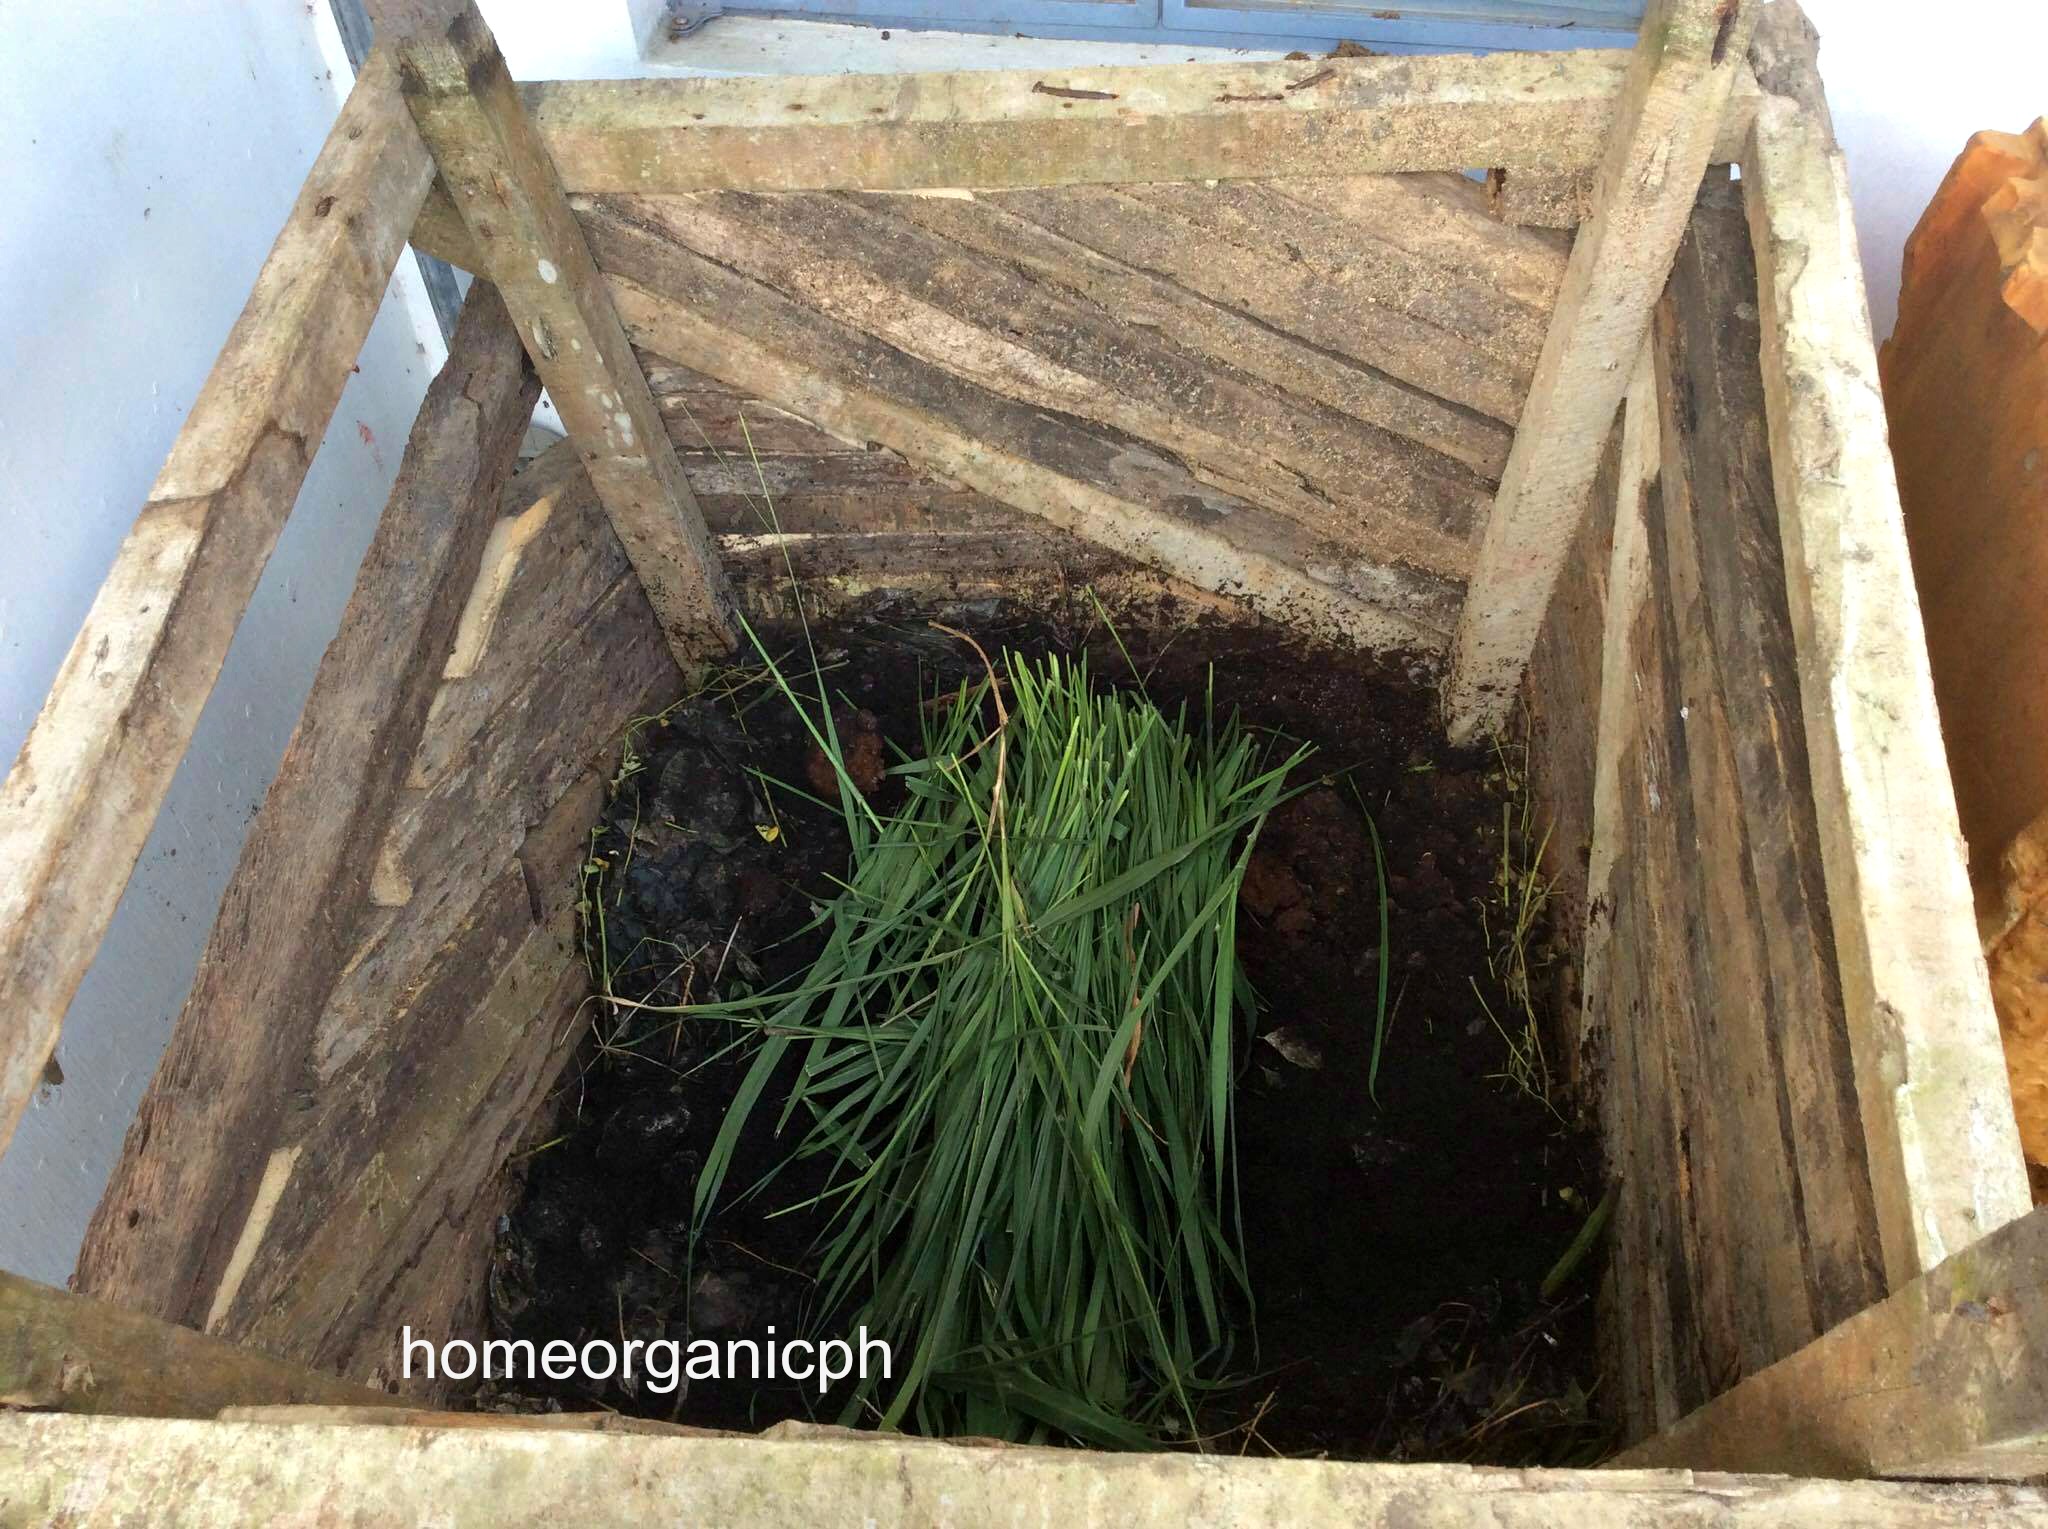
- We gather substrates (grass, kakawate, coffee grounds, egg shells, banana trunk) and compost them in the heap. Compost heap is recycled mount (which I inverted to become a box) and other wood left when we constructed the house. Once they decompose, we feed them to the worms.
- Once we harvest worm castings or vermicompost (vermicast) and when not used, I keep them in recycled bucket. Vermicast is the complete organic fertilizer!
- We put fish gills and molasses into recycled water jug. Once decomposed, we mix them with water, and feed it to the soil.
- We catch vermi-tea that comes out of the worm bin into recycled plastic containers, and when not used, store them in the jug.
- We gather urine in plastic containers, too. We mix urine with water, and feed it to the soil.
- Preparing/designing the vermi-bin
- Concrete structure
- Old tire
- Sack
- Basin or similar materials
- Bamboo
- Banana trunks
- Other materials native to your area
- We bought a discarded refrigerator box for PhP 50 at the junk shop. We chose this because it is readily available, and is the cheapest solution.
- This is my vermicompost bin. You will see that it is sturdy, and can withstand the constant watering (it doesn’t easily degrade). It also has a drainage hole, the tea of which I gather in plastic containers, for daily use. I cover it loosely with discarded materials like wood and basin, to shield it from noon-time sun and heavy rains.
- We also had another vermicompost bin constructed, as I needed more worm castings or vermicompost (vermicast). While wastes in one compost bin is being decomposed by the worms, I’m also semi-decomposing other substrates.
- My compost bin breaks down my kitchen wastes, which I feed later on to the worms.

- Choosing location.
- Preparing the substrate
- Here is the list of substrate: exact formula or proportion of carbon-nitrogen ratio. C-70%, N-30%.
- Carbon source
- Hay/rice straw, grass, banana tree parts, degraded fruit and vegetable peelings, sugarcane leaves, bagasse or mud press, coconut and corn, saw dust, paper or carton
- Nitrogen source
- Leaves of madre de cacao (Gliricidia sepium); ipil-ipil (Leucaena leucocephala); parts of peanuts and other leguminous plants like kadyos (pigeon pea), monggo, and others; baging ilog, and all kinds of animal manure, except that of humans, dogs, cats, to avoid the presence of teh E. Coli bacteria.
- Gather all kinds of biodegradable waste in a sack or any container. If you have any, spray these with “Effective Microorganism” (EM) mixture to hasten its decomposition. In the absence of EM, occasionally wet the biodegradable waste and place these in a shaded area.
- After 7-14 days, these semi-decomposed materials can be fed to the worms. This is called “Anaerobic Decomposition”.
- Note: Only cooled and semi-decomposed materials may be fed to the worms.
- Feeding the worms
- Once substrate are decomposed and cooled, these may be fed to the worms.
- For every 50 kilos of substrate, put in 1 kilo of worms. This is the starter substrate.
- Maintaining the vermi-bin
- Cover the vermi-bin.
- Maintain moisture level of the substrate (60-70% moisture content, with 5-7 drops when squeezed).
- Turn the substrate if too compacted.
- Protect the worms against chickens, rats, snails, birds, frogs, ants, and humans.
- My vermicompost bin is being attacked by rats. I will have my bin covered. I will post a picture once the cover is accomplished.
- Harvesting
- The bin may be harvested once it is at 90% castings.
- Manually skim harvest the top of the casting heap.
- Place new substrate beside existing casting heap so the worms will move (to the new substrate).
- Storage or usage
- Sieve the castings, and place in sack, if they will be sold.
- Maintain 30% moisture.
- There is no need to sieve castings if they will be used in one’s own farm.
Source: Flyer prepared by:
- Republic of the Philippines, Province of Negros Occidental, Provincial Administration Center, Bacolod City;
- Balay Pag-Inupdanay Foundation Inc., “A Network of Community-Based Alternative Learning Systems”. Satellite office: 222 Punta Makiling Street, Brgy Villamonte, Bacolod City, Negros Occidental;\
- Pag-Inupdanay Inc., “Serving the Underserved and Reaching the Unreached”. No 23 Huey St., Phase 1, Seaview Subd., Brgy Guinhalaran, Silay City, Negros Occidental;
- Task Force Mapalad. #51 Tandang Sora Street, Ramylu Village, Bacolod City, Negros Occidental. Telephone and Fax No. (034) 444-0948. Email: tfmbacolo@gmail.com
- Vermi Practitioners Association of Negros, “Your Organic Partner”, Purok Masinadyahon, Barangay Busay, Bago City, Negros Occidental.